Team members
Invite people to work in your Walletap account, choose their role and locations, and change or remove their access.
Team members are people who sign in with their own login and work in your account: a manager who runs campaigns, a colleague who designs passes, staff who enrol customers at the counter. Nobody shares a password, and you can take access away without touching anyone else's.
Paid plansBefore you start#
- You are the account owner. Only the owner manages the team.
- The account has at least one location. Every team member is assigned to one or more.
- You know the email address the person will sign in with.
Invite a team member#
- Open Team members
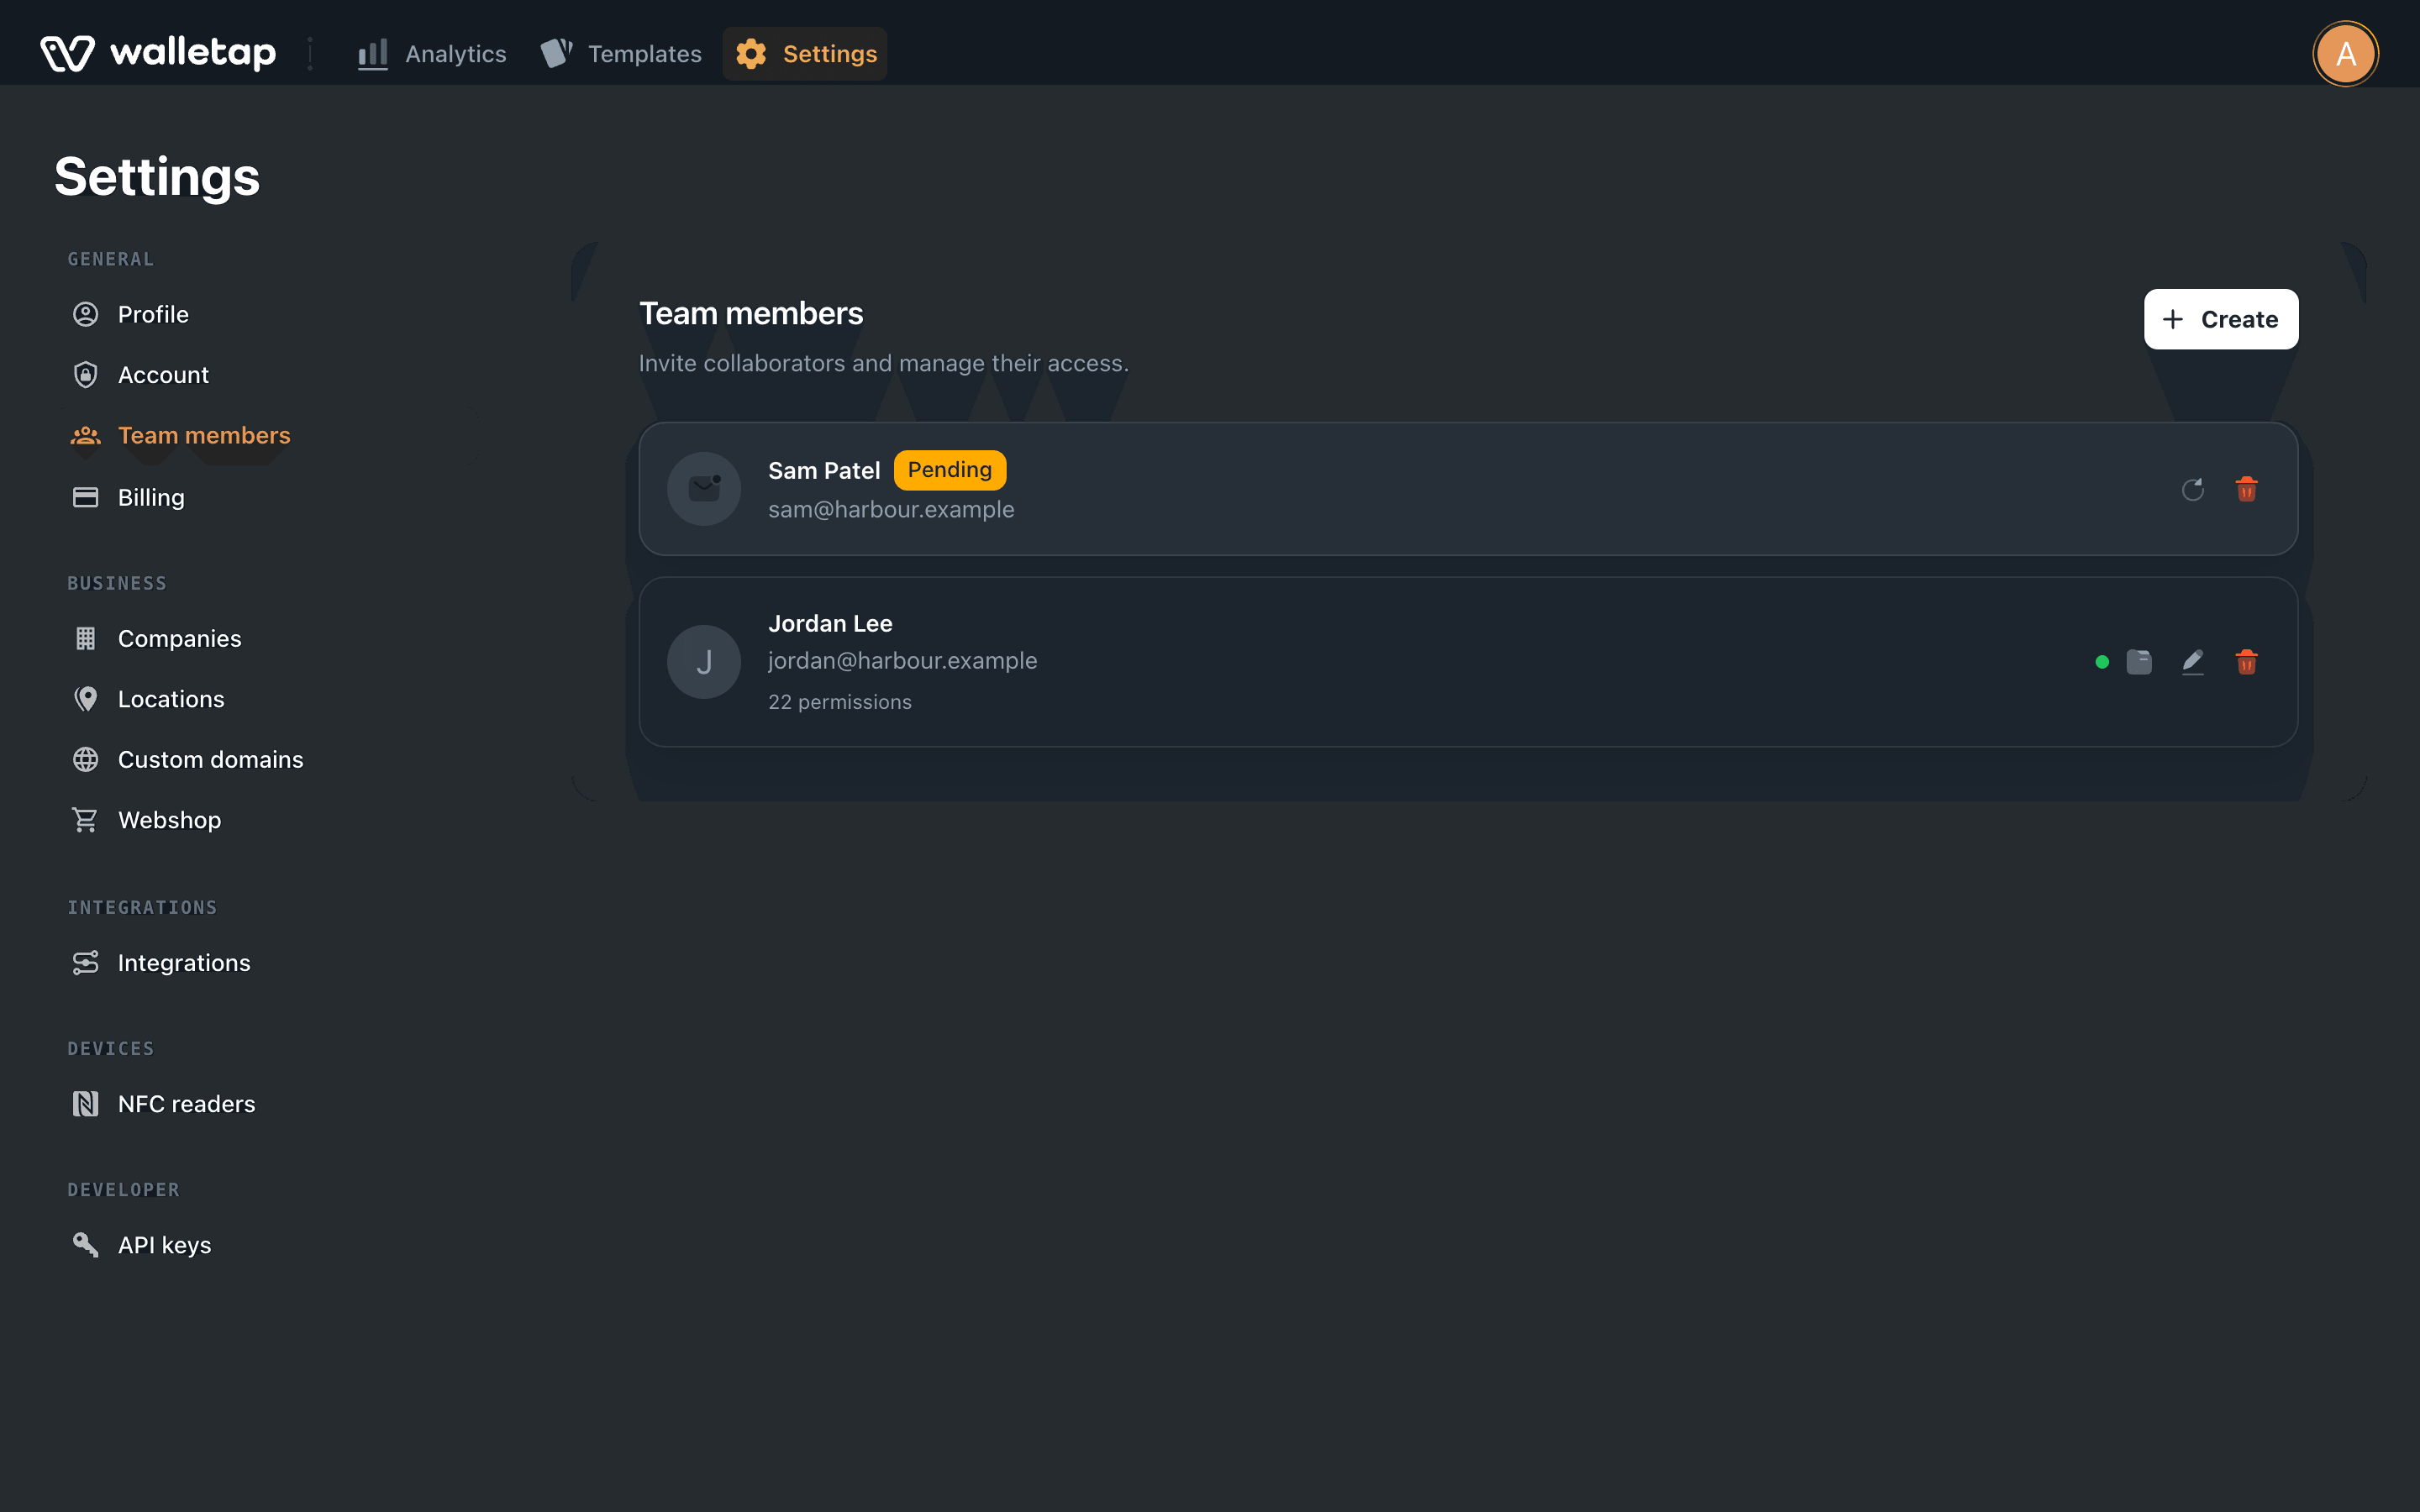
Go to SettingsTeam members and click Create.
- Enter who they are
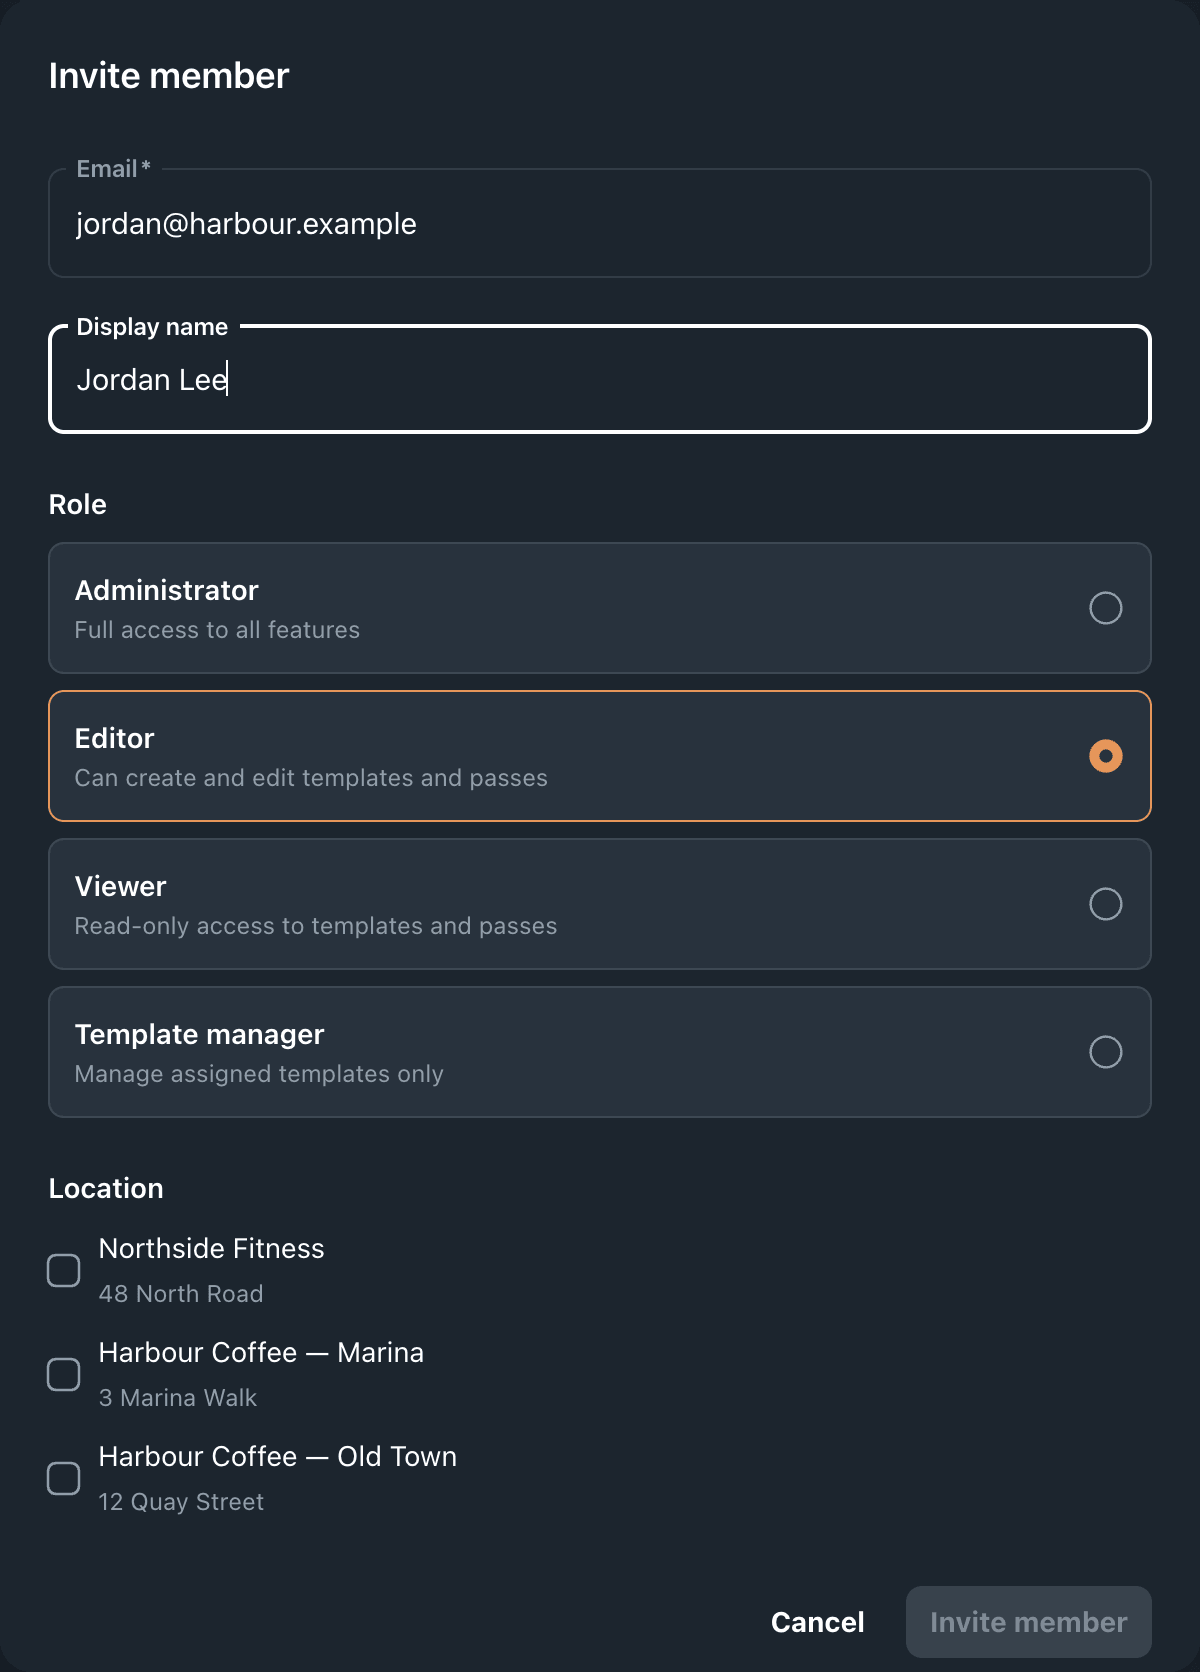
Fill in Email and, optionally, Display name — how they appear in your team list and in the invitation email.
- Choose a role
Pick one of the role cards. See Roles below. You can change it later.
- Choose their locations
Tick each Location the person works at. With more than one ticked, mark one as Primary.
- Send the invitation
Click Invite member. Walletap emails the invitation, and the person appears at the top of the list with a Pending label until they accept.
Invitations expire after 7 days. Each pending invitation holds a seat, so it counts toward the team members your plan includes.
The account owner can do the same from the mobile app, in SettingsTeam members.
What the invited person does#
The email arrives from you via Walletap, with the subject … invited you to join their team on Walletap.
The button in the email signs them in with that address directly, so most people never see a form. Someone who already uses Walletap keeps their own login, and your account appears in their account menu.
They must sign in with the address you invited. Any sign-in method works: email link, password or Google.
Roles#
A role decides what the person can do in your account. The invitation offers four.
| Role | Intended for |
|---|---|
| Administrator | Running the account day to day: templates, members, campaigns and locations. Everything except what stays with the owner. |
| Editor | Creating and editing templates and issuing passes. |
| Viewer | Looking up templates, passes and analytics. |
| Template manager | Working on pass templates and the passes issued from them. |
A team member whose permissions were set by hand shows as Custom when you edit them.
What stays with the owner#
Whatever the role, some things are the owner's alone, because they carry money, legal identity or credentials:
- billing and the plan
- companies, and with them payouts and fiscal certificates
- API keys
- custom domains and white-label
- the webshop, integrations and NFC reader settings
- managing the team itself
When a team member opens Settings in your account, they see Profile, Account and Locations.
Cancel or repeat an invitation#
Pending invitations sit at the top of SettingsTeam members.
- Cancel invitation (bin) withdraws it and frees the seat. The link in the email stops working.
- To send a fresh invitation — because the first one expired or went to spam — cancel the pending one, then invite the same address again.
Change a role or pause access#
- Open the team member
In SettingsTeam members, click Edit permissions (pencil) on their row.
- Make the change
In Edit team member, change the Display name, pick another role card, or switch Active off to pause their access without removing them. The email address cannot be changed.
- Save
Click Save. The dot on their row shows green while they are active.
Remove a team member#
Click Remove team member (bin) on their row and confirm. They lose access to your account at once.
Their login is theirs and stays: they may belong to other accounts. You can invite the same address again later.
Team members, staff and devices in the apps#
Team members sign in to the desktop and mobile apps with the same login they use for the dashboard, and work in your account there too.
Two related things are set up separately:
- Staff devices — each phone or tablet that scans passes counts toward your plan's devices. See Devices.
- Employees — staff who hold a pass on an Employees membership plan, for example to get through the door. An employee pass never expires, and door readers let it in outside the location's working hours. Employees check in and out at the desktop app. You see who is on shift, and each employee's hours, on the Employees page in the desktop app, or in SettingsBusinessEmployees in the mobile app. See staff shifts.
If something goes wrong#
- Your plan includes … team members. Upgrade to add more. Every seat is taken, pending invitations included. Cancel an old invitation, remove someone, or click Upgrade in the dialog.
- Invite member is greyed out. Tick at least one location. With no locations at all, the dialog says No locations yet. Create one first.
- This person is already a team member. They are on the list already. Edit their row instead.
- Invitation already sent to this email. An invitation to that address is still pending. Cancel it first if you want to send a new one.
- This invitation was sent to a different email. The person signed in with another address. Ask them to sign out and sign in with the invited one.
- Invalid Invitation, with Invitation has expired or Invalid or expired invitation under it. The invitation expired or was cancelled. Cancel it if it is still listed, and invite the person again.