Create a template
Choose a template type and the options that are fixed at creation, then design the pass yourself or with AI.
Creating a template takes a minute: you pick what kind of pass it is and answer a few questions — some of them fixed once the template exists — and Walletap opens the designer with a working starting point. Everything about the look can be changed afterwards.
Every planBefore you start#
- Your account needs room for another template. When it is full, Create shows a lock and leads to an upgrade instead of the create dialog.
- A team member needs permission to create templates. The account owner grants it in Team members.
- To redeem passes over NFC, add your own Apple Developer credentials first — see Barcodes and NFC.
Create a template on the web#
- Open the create dialog
Go to Templates and click Create. The dialog asks How do you want to build this pass?
- Choose how to design it
Choose Design it myself to set every option here and design in the designer. Choose Create with AI to have Walletap design it from your website — that path is covered in AI designer.
- Name the template
Enter a Template name — for example Coffee Card. It is how the template is listed in the dashboard and the apps, and it becomes the pass title until you change that.
- Choose the type and options
Pick a Template type, then go through the options below it. Each is explained in The options.
- Create it
Click Create Template. The template is created and opens on its Design tab. If an offer to try a plan appears first, choose either option — the template is created next either way.
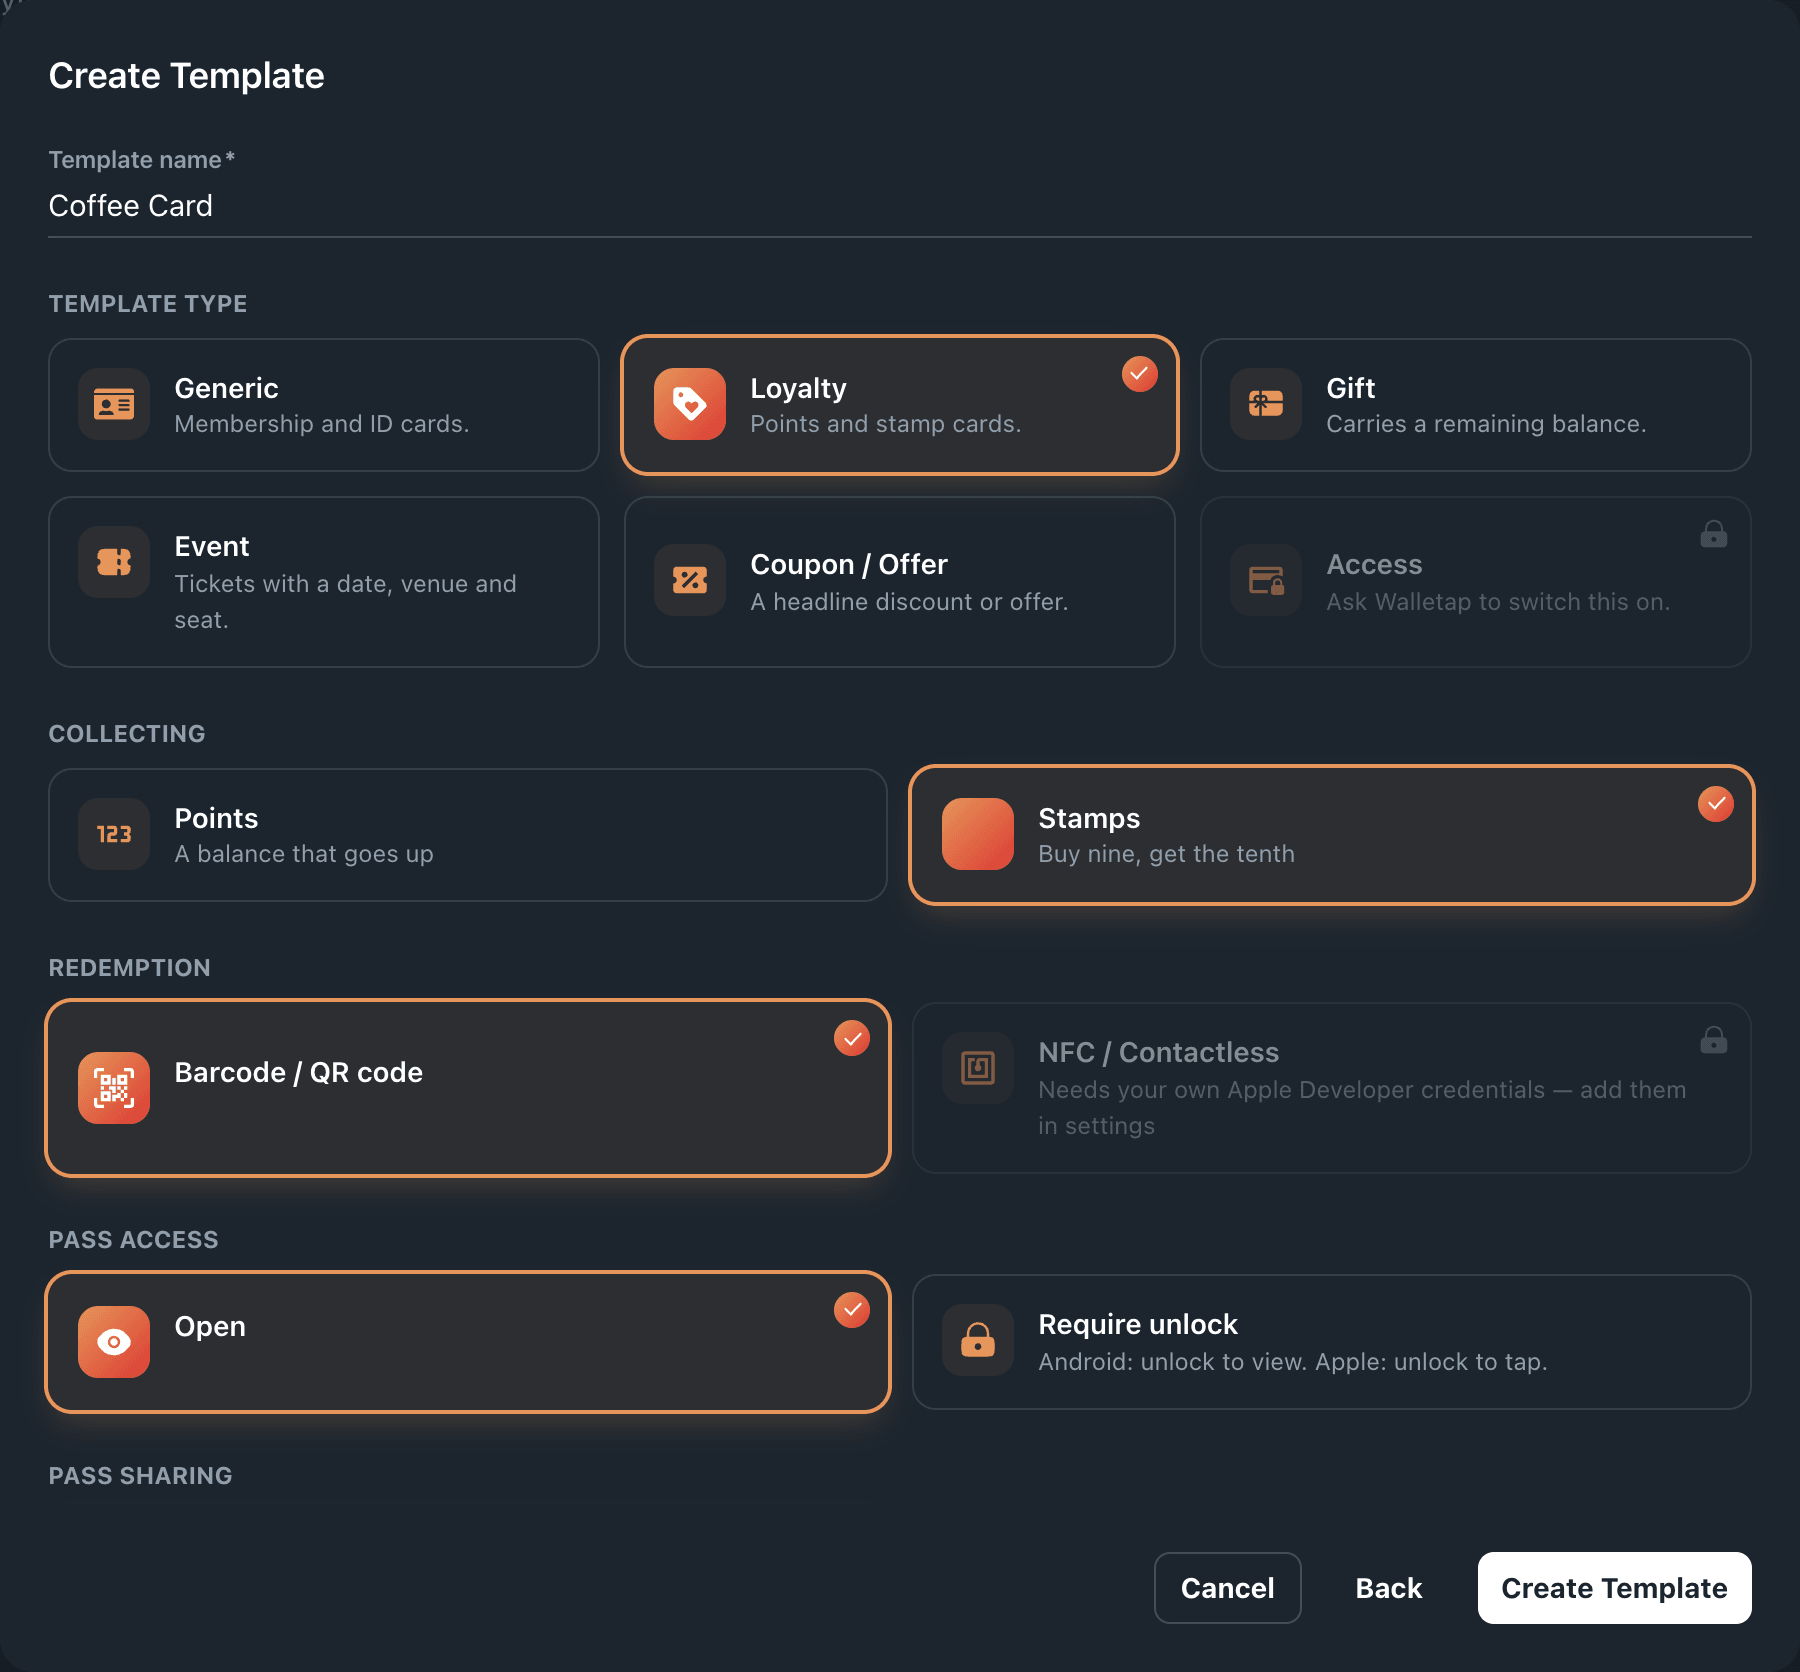
The options#
| Option | Choices | What it decides | Change it later |
|---|---|---|---|
| Template type | Generic, Loyalty, Gift, Event, Coupon / Offer | The wallet layout and the built-in fields on offer. See Template types. | No |
| Collecting (Loyalty only) | Points — a balance that goes up. Stamps — buy nine, get the tenth. | A stamp card draws its stamps across the banner and starts with ten. A points card shows a balance. | Yes, in Stamps |
| Redemption | Barcode / QR code, NFC / Contactless | Whether the pass carries a code staff scan, and whether it can be tapped on a reader. | Barcode: yes, in Barcode |
| Pass access | Open, Require unlock | With Require unlock, Android asks the holder to unlock the phone before showing the pass, and Apple asks before an NFC tap. | No |
| Pass sharing | Multiple users, One user, many devices | Multiple users: anyone with the pass link can add it. One user, many devices: Apple Wallet hides the share button and Google Wallet keeps the pass with one holder. | No |
Require unlock stops Android holders opening the pass from its web link. Leave it on Open unless the pass guards something valuable, such as a door.
What a new template starts with#
Walletap fills each new template with a sensible front and back for its type, a light grey background and placeholder artwork. Replace the logo, icon, banner and poster artwork with your own in Images before you issue passes.
| Type | Front | Back |
|---|---|---|
| Generic | Headline Member; row Member Id and Valid Until | Empty |
| Loyalty | Row Member name and Points | Member Id, Rewards tier |
| Gift | Headline Balance; row Card Number | Updated |
| Event | Headline Event name; rows with the event date and time, then Gate, Row, Seat | Ticket holder, doors open, start and end, ticket type and number, terms |
| Coupon / Offer | Headline Details; row Expires | From, Disclaimer |
Generic and Loyalty templates also start with a sign-up form asking for full name, e-mail and phone number, so customers can join straight away. See Sign-up form and QR code.
Create a template in the mobile app#
The mobile app creates Loyalty templates. For other types, use the dashboard.
On a new account the app opens the designer by itself and shows Let's create your first pass. Otherwise, go to SettingsActive template and tap + on the Templates screen.
- How should your pass work?
Choose the Loyalty type — Points, Stamps or Both — then the Barcode type, Pass access and Who can hold this pass. Who can hold the pass is fixed once the template exists.
- How should it look?
Tap Design with AI to design it from your website, or Design manually to choose the banner, stamp, logo and colours yourself.
- Business info & links
Add a website, phone number, e-mail, address or note to the back of the pass, or skip it.
- How do people join?
Choose You send them the pass, They scan a QR code or Both, then adjust the sign-up page that follows. Skip for now keeps the default form.
- Location
Add your business location. Tick Also notify passholders near here to show the pass on the lock screen nearby — see Locations and lock-screen relevance.
- Review & create
Check the summary and tap Create template. A design you made yourself asks for the Template name here; an AI design brings its own.
If you chose a QR code in step 4, the app shows Your sign-up page is live with the sign-up QR code ready to share or print. Otherwise it takes you to the new template.
If something goes wrong#
Create shows a lock, or the dialog says "Your plan includes … templates. Upgrade to add more." — the account has no room for another template. Click Upgrade, or delete a template you no longer use.
"The template was created but could not be opened. Check your templates list." — the template exists. Open it from Templates instead of creating it again.
"Failed to create template" — the request did not reach Walletap. Check your connection and click Create Template again.
NFC / Contactless is greyed out — it needs your own Apple Developer credentials. See Barcodes and NFC.
"You don't have permission to create templates." (mobile) — ask the account owner to add the permission to your role.
"You've reached the number of templates your plan includes." (mobile) — the same allowance as on the web. Upgrade, or delete a template you no longer use.
"We couldn't create the template. Check your connection and try again." (mobile) — tap the button again once you are back online.