Sell memberships online
Set up the membership webshop — a branded page for each location where people buy or renew a membership by card and get their pass straight away.
The webshop is a page per location where a customer picks a plan, pays on a Stripe checkout page and lands on their new pass. Returning members renew the pass they already have.
Add-onBefore you start#
- Each location that sells is assigned to a company. See locations.
- That company has Stripe connected under SettingsIntegrationsStripe. See Stripe.
- The membership template has at least one public plan with a Stripe price on that company. See membership plans.
- You are the account owner. Team members do not see the Webshop settings.
What the customer sees#
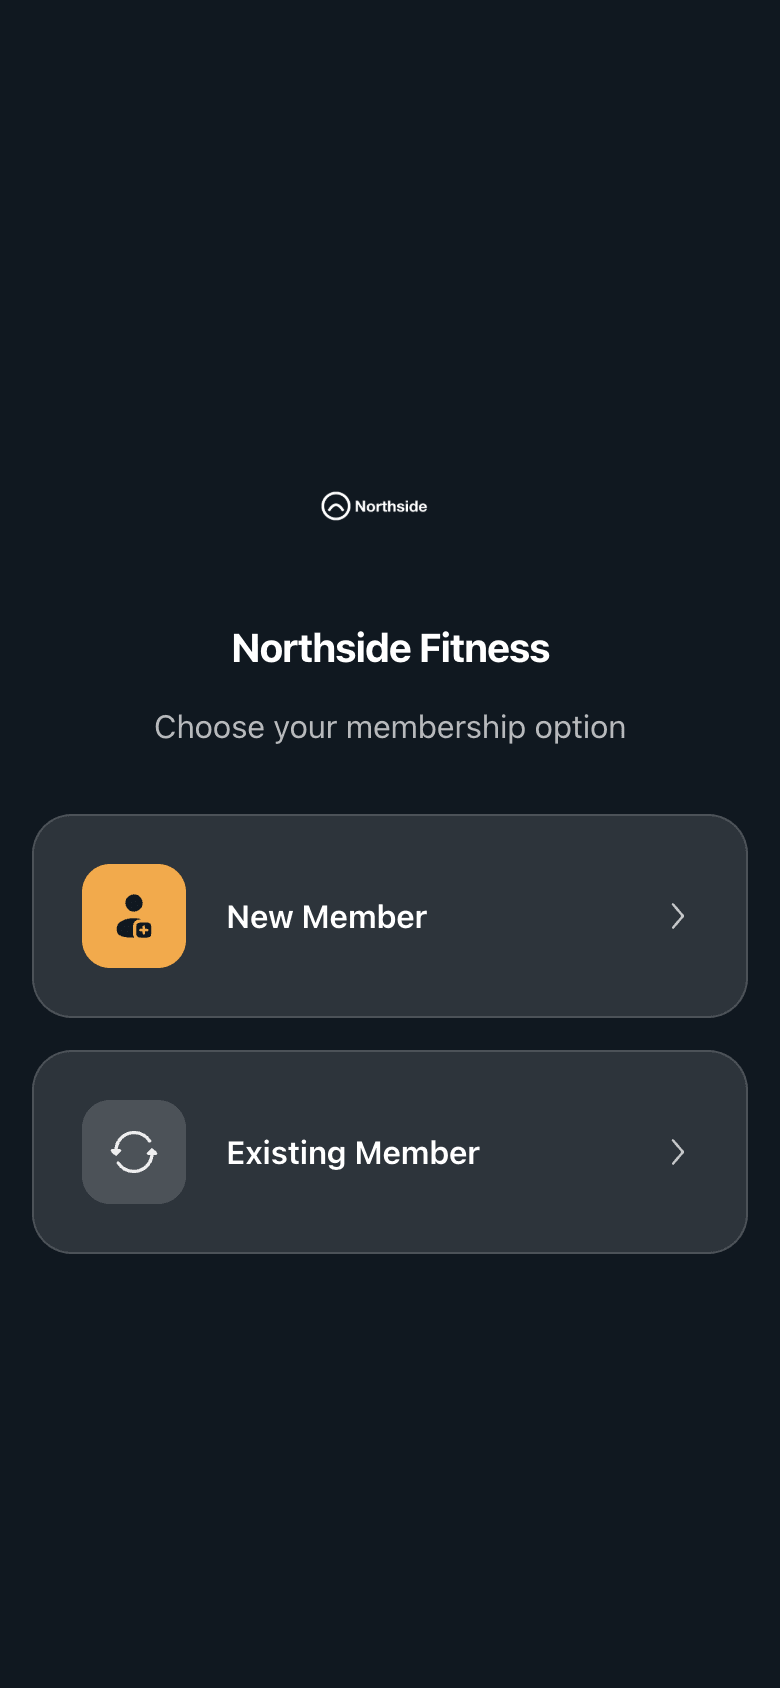
The page opens with two choices.
New Member lists the templates on your account — the step is skipped when there is only one — then that template's plans, cheapest first. Stripe Checkout asks for the card, the email address and, as extra checkout fields, the template's other sign-up questions apart from the phone number. When the payment succeeds, Walletap creates the member and a new pass, shows Payment Successful! and takes the customer to their pass, where they add it to Apple Wallet or Google Wallet.
Existing Member renews a pass the customer already holds. The page asks them to Scan Your Pass and waits until that pass is scanned at the location — at a desk reader or a door — then shows the name and asks Is this you?. After Yes they pick a plan and pay, and the same pass gets a later end date. Nothing new lands in their wallet; the card they have simply updates.
New Member always issues a new pass. A returning member who buys through it pays for a second pass while their old card still reads as expired at the door. Send returning members to Existing Member, for example with a sign at the desk next to the reader.
If a plan has Requires document verification on, the customer uploads a photo of the document before paying. The pass is issued or renewed as soon as the payment succeeds, and the account owner receives a Verify document email naming the member and the plan, with the photo attached. A reply to that email goes to the member.
To look at the document later, open the member in the desktop app and click the ID-card icon on that pass's row in the passes table. The photo opens in a Verification document dialog. If the document does not qualify, invalidate the pass.
Where fiscalisation is set up for the company, the buyer also receives a fiscalised invoice by email.
Brand the webshop#
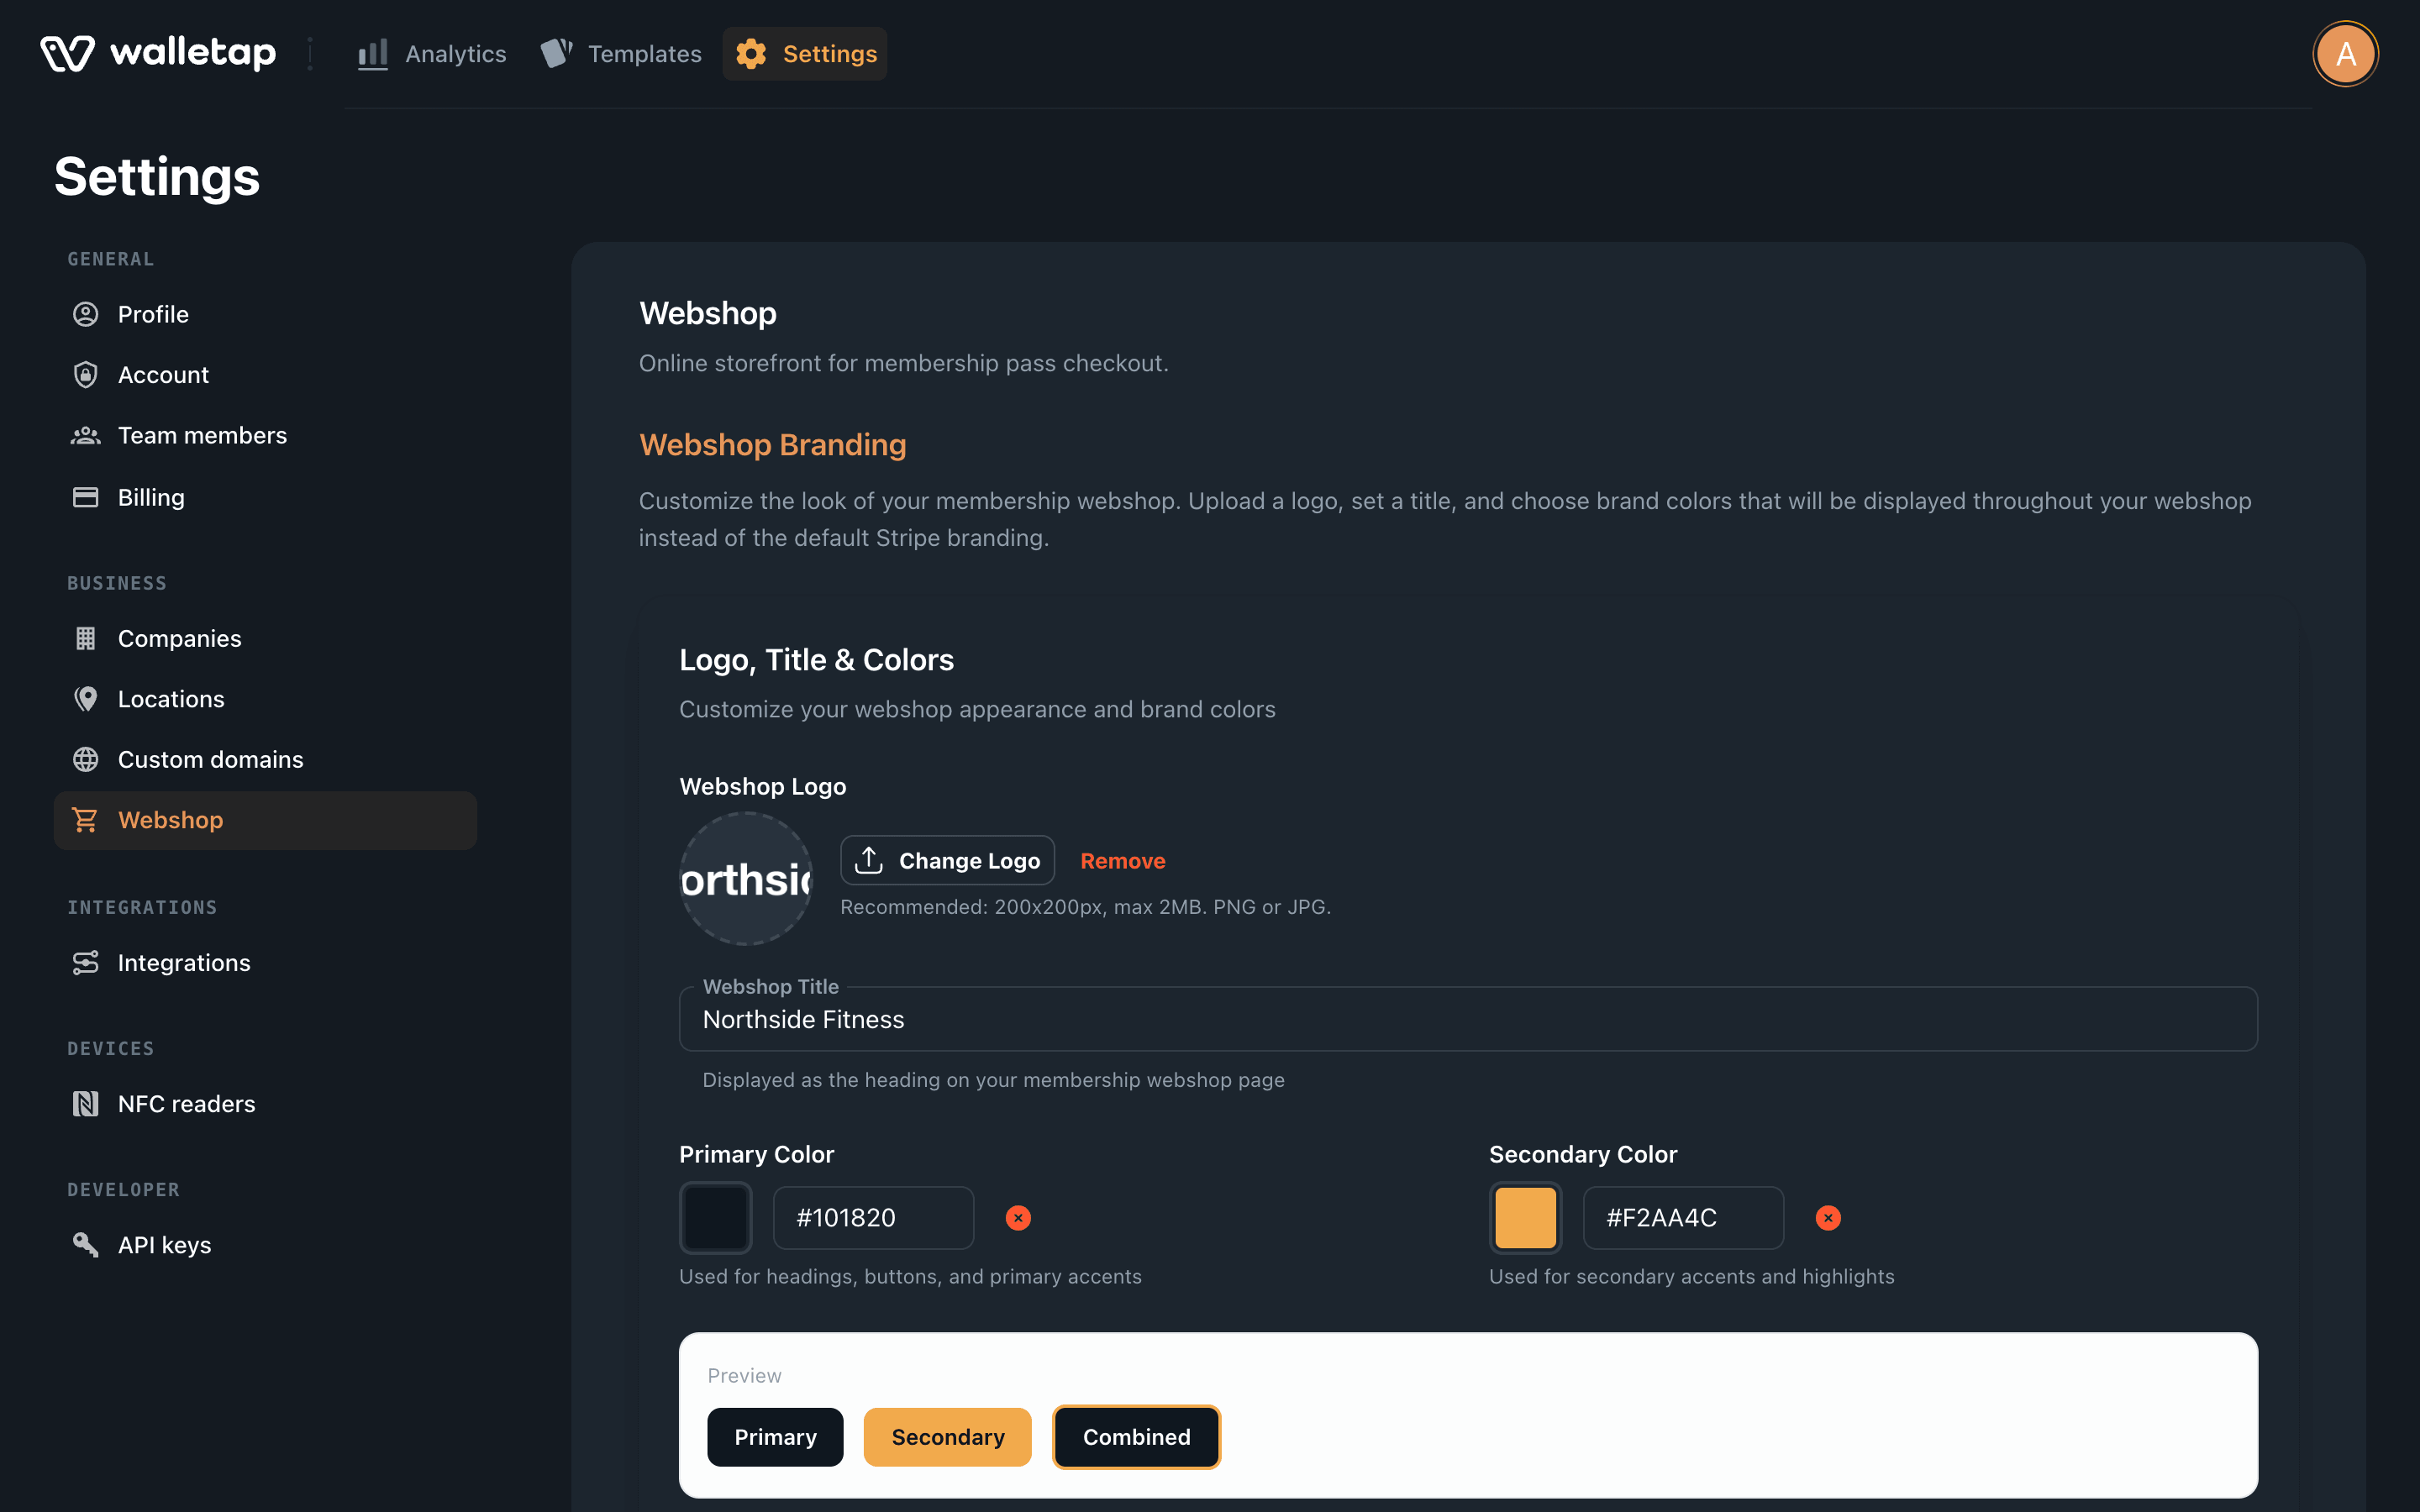
- Open Webshop
- Add a logo and a title
Under Logo, Title & Colors, click Upload Logo and pick an image under 2 MB. Type a Webshop Title, for example Northside Fitness. Without a title the page shows the location's name.
- Pick the colours
Set a Primary Color for the page background, and a Secondary Color for buttons and accents. Text switches between dark and light on its own so it stays readable.
- Save
Click Save Branding. The colours and logo apply to every location's page.
Give a location a short URL#
Each location's webshop has a short address of the form
shop.walletap.com/your-keyword. Put it on a poster, a QR code or your website.
- Add a short URL
In SettingsWebshop, under Location Short URLs, click Add Short URL.
- Choose the location
Pick the Location, for example Northside Fitness.
- Type the keyword
Use lowercase letters, numbers and hyphens, 3 to 30 characters — for example
northside. A green tick means it is free. - Save
Click Save. The card now shows the full address,
shop.walletap.com/northside, ready to copy.
Use your own subdomain#
To serve the webshop from an address like shop.harbour.example, set up the
subdomain under Custom Domain.
- Enter the subdomain
Type it into Subdomain and click Configure. It must be a subdomain — three levels or more.
- Add the DNS records
The DNS Records Configuration table lists the records to add at your DNS provider: a CNAME for the subdomain and a TXT record that proves you own it. Copy each Expected Value exactly.
- Verify
Click Verify Domain. DNS changes can take up to 48 hours to be visible; until then a record shows Pending. Once both pass, the page reports Custom Domain Active! and lists your short URLs on the new address.
Checkout returns customers to the custom domain once it is verified.
Recurring plans#
A plan sold as a Recurring subscription charges the customer again every plan length. Each successful charge moves the pass's end date to the end of the new period, with nothing for staff to do. If the subscription is cancelled or stays unpaid, the pass is invalidated and refused at the desk and the door.
If something goes wrong#
"No membership plans available". The template has no plan that is public, active and priced on the Stripe account of this location's company. Open the plan in the desktop app and tick that company under Sync to Stripe accounts.
"Could not start the payment", or a plan stops loading without opening checkout. The location's company has no connected Stripe account, or the plan's price is not on the Stripe account the company is currently using. Check SettingsIntegrationsStripe.
"Could not load membership plans". The page lost its connection. The customer taps Try again.
Existing Member waits forever. The pass has to be scanned at the same location the page belongs to, while the page is open, and the device needs an internet connection. The page shows Still waiting? after a while with the same advice.
"This shortname is already taken" or "This shortname is reserved and cannot be used". Choose another keyword.