Stripe
Connect a Stripe account to each company so members can pay online, with test and live kept apart and payouts going to that company's bank.
Stripe takes the payments for membership plans and the webshop. You connect one Stripe account per company, and every payment taken at that company's locations is charged on that account and paid out to its bank.
Add-onBefore you start#
- You are the owner of the Walletap account. Team members do not see the Integrations screen.
- The company exists under SettingsCompanies. Payments are connected per company, so the Payments group appears only once there is one.
- The locations that sell are assigned to that company. Check the Company field when you edit a location under SettingsLocations.
- You can sign in to the company's Stripe account, or you are ready to create one. Stripe's own sign-in page offers both.
How a payment finds the right bank#
Walletap follows the location a member buys at to its company, and charges on that company's Stripe account.
- Your account
- Harbour Hospitality LtdStripe account, bank
- Harbour Coffee — Old Town
- Harbour Coffee — Marina
- Northside Fitness
Payments are charged directly on your Stripe account. They appear in your Stripe dashboard, Stripe's fees are settled there, and Stripe pays out to the bank account set up in that Stripe account on its own schedule. An account with two legal entities connects two Stripe accounts, one per company.
Connect Stripe#
- Open the Payments group
Go to SettingsIntegrations. Under Payments there is one Stripe row for each company, reading Not connected.
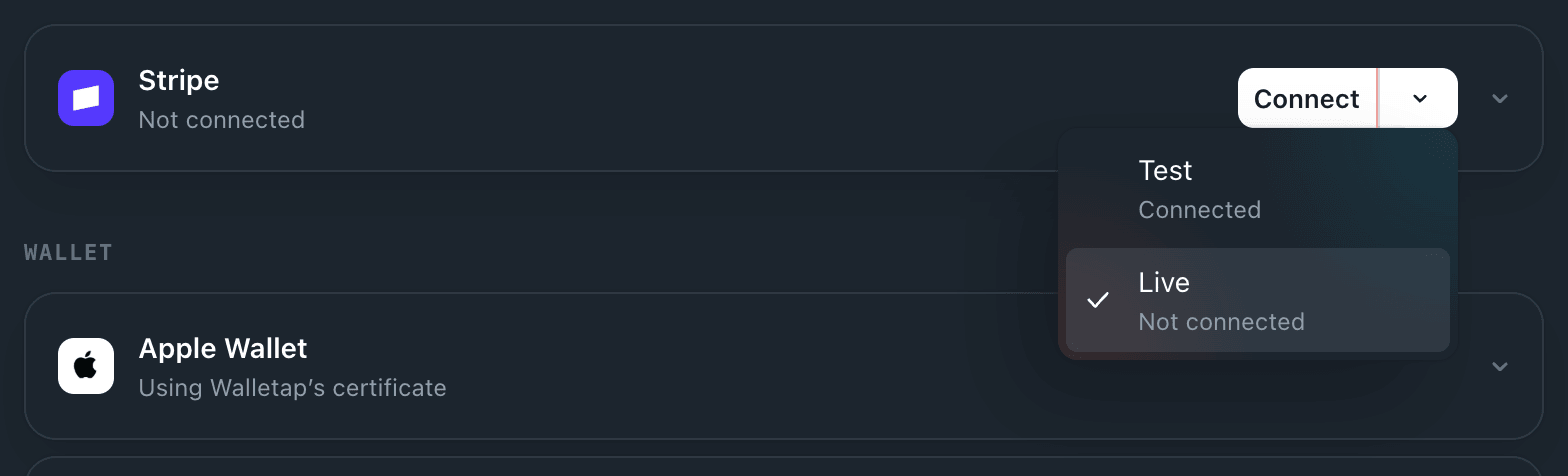
- Choose the environment
- Authorise in Stripe
Click Connect. Stripe opens. Sign in to the company's Stripe account, or create one, and approve the connection.
- Check the result
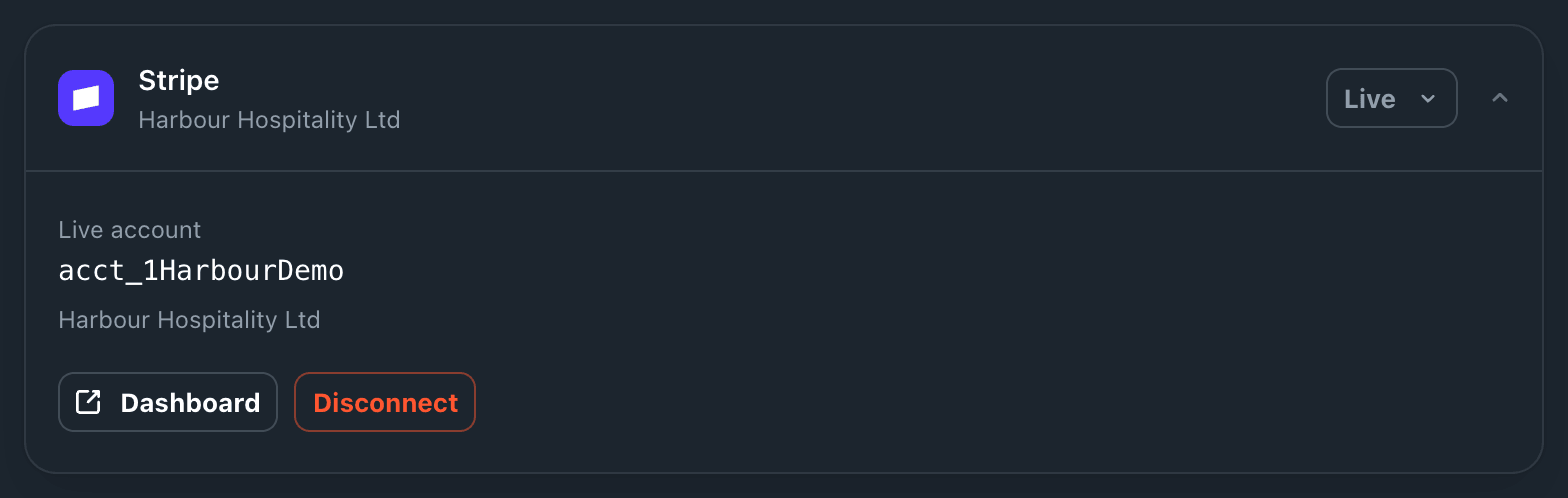
Stripe sends you back to Integrations with a message such as Stripe connected in live mode. The row's status line now shows the Stripe account's business name.
Open the row to see the connected account's ID. Dashboard opens that account in Stripe; Disconnect removes it.
You can also connect from the desktop app: SettingsCompanies, open the company, then Connect with Stripe under Stripe Connect. It is the same connection, so it shows up on the web as well.
Test and live#
Test and live are two separate connections, kept side by side. Connecting one never touches the other.
- Test uses Stripe's test environment. Pay with one of Stripe's test card numbers and no money moves. If the company also fiscalises sales, test purchases are filed with the tax authority's test service.
- Live takes real payments.
The environment you pick in the menu is the one checkout uses. To go live after testing, open the menu, choose Live and click Connect. To switch back, choose Test again; the live connection stays in place.
A membership plan's price lives on the Stripe account, and in the environment, it was created in. After you connect a different account or go live, sync each plan you sell to it from the desktop app's plan editor. See membership plans.
What it powers#
- The webshop and membership checkout. Members pay for a plan online and receive their pass. See selling online.
- Renewals. Recurring plans renew through Stripe, and Walletap keeps the member's pass valid in step with the subscription. See renewals and freezes.
- Fiscal receipts, for companies that fiscalise online sales. See fiscalisation.
Disconnect#
Open the row and click Disconnect. You are asked to confirm, for example Disconnect the Stripe live account? Live payments will stop. Only the environment currently selected is disconnected.
Disconnecting live stops online payments for every location of that company straight away.
If something goes wrong#
"Stripe Connect failed." followed by a reason. Stripe did not complete the connection — usually because the authorisation was cancelled on Stripe's page. Click Connect again and approve it.
The status line says Live · charges not enabled yet. Stripe has not finished verifying the account, so it cannot take payments. Click Dashboard, complete what Stripe asks for, then disconnect and connect again so Walletap reads the account's new status.
"Membership plans is available on a paid plan." Connecting a first Stripe account needs a plan that includes membership plans. An account already connected anywhere can reconnect and switch environments on any plan.
There is no Payments group. The account has no company yet, or you are not the account owner. Create the company under SettingsCompanies.
Payments arrive in the wrong Stripe account. The location is assigned to a different company. Edit the location under SettingsLocations and set its Company.