Add members
Every way a person gets a pass — the sign-up page, the dashboard, the apps, a file import or the API — and when to use each.
A pass is issued to a person in one of five ways. They all end in the same place: a member on the template's Members tab, and a pass the person adds to their wallet.
Every planChoose a method#
| Method | Who types the details | Best for | How the pass reaches them |
|---|---|---|---|
| Sign-up page | The customer | Posters, table cards, your website | They land on their pass page as soon as they submit |
| Dashboard | You | One person at a time, from a desk | Email or text message, by your delivery settings |
| Desktop and mobile apps | Your staff | The counter, the front desk, the door | Email or text message, or scanned from the screen in the mobile app |
| Import | You, from a file | Moving an existing customer list | Email or text message, switched on or off per import |
| API | Your own system | A website, booking system, till or CRM | Email or text message, unless the request turns it off |
Whatever the method, the template decides which details are collected. Its sign-up form — set up in DesignRegistration — lists the fields, and the dashboard's New member form asks for the same ones. See Sign-up page.
Before you start#
- A template to issue from. See Create a template.
- To send passes by text message, or to enter phone numbers in the dashboard, your plan needs text messaging: Paid plans
Let customers sign themselves up#
A template's sign-up page is a form at https://enroll.walletap.com/ followed by
the template's ID. You build the form under
TemplatesCoffee CardDesignRegistration; the page goes
live once the form has at least one field. Open on the preview there opens
the live page.
Share the link, or print it as a QR code on a table card or poster. When someone submits the form, Walletap creates a member and a pass, and takes them straight to their pass page to add it to their wallet.
To know which site a customer joined at, use a location's own link: go to SettingsLocations, open the enrolment links for Harbour Coffee — Marina, and copy the link for the card. Each pass issued through it records that location as its home.
See Sign-up page for designing the form.
Add a member in the dashboard#
- Open the Members tab
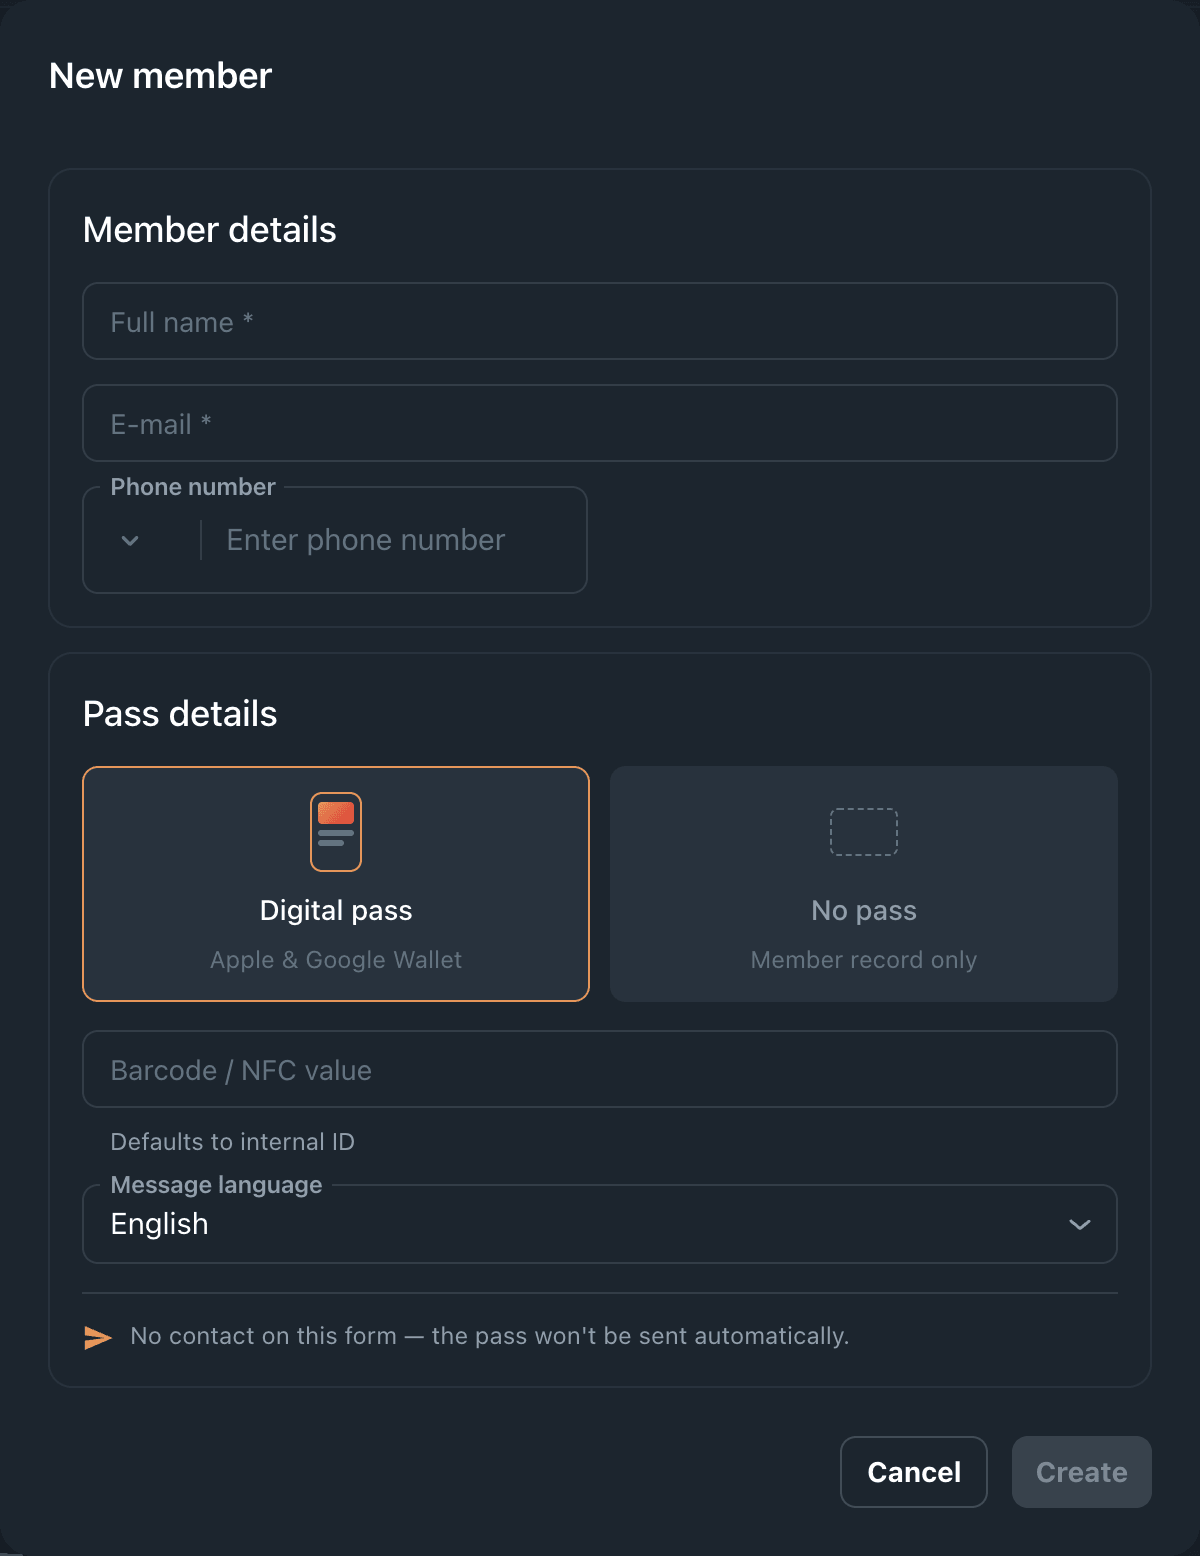
Go to TemplatesCoffee CardMembers and click Create. The New member dialog opens.
- Fill in the member details
Under Member details, enter the person's name. The other fields follow the template's sign-up form, with its labels:
- E-mail and Phone number appear only when the form asks for them.
- Every other field on the form appears under Additional information.
A label ending in
*is required on the sign-up form. - Choose the pass
Under Pass details, choose Digital pass to issue an Apple and Google Wallet pass now, or No pass to save only the member record.
For a digital pass you can also set:
- Barcode / NFC value — what the pass's barcode holds. Leave it empty to use the pass's own ID.
- Message language — the language of the email or text message.
- Check the delivery line
The line at the bottom of Pass details says what happens when you click Create — for example "Sent automatically by e-mail once created." It follows your delivery settings.
- Create the member
Click Create. You see "Member and pass created", or "Member created" for No pass, and the new member is selected in the list.
If a member with the same email already exists on this template — or, when no email is given, the same phone number — Walletap gives the new pass to that member instead of creating a second one.
Give an existing member another pass#
- Select the member
On the Members tab, select the person — for example Maya Chen — and click Add pass in the Passes section. The Create Pass dialog opens with their email and phone filled in.
- Fill in the pass
The Manual tab lists the template's per-pass fields: Front fields, Back fields, Validity (Valid From, Valid Until), Redemption and, on a stamp card, Stamp collection, where clicking the stamps sets the starting count.
To issue several passes to the same person at once, click + next to Pass 1. You can add up to ten; they are delivered together under one link.
- Set delivery
Under Delivery, choose the Message Language and switch Send to Email and Send to Phone on or off for this pass.
- Save
Click Save. The new pass appears in the member's passes table.
The Automatic tab of the same dialog shows the API request that would issue this pass, so you can copy it into your own system.
Add members from the apps#
Staff at the counter add members from the desktop or mobile app. In the mobile app they can also show the pass on screen for the customer to scan. See Add members in the apps.
Import a list#
To move an existing customer list into Walletap, import it from a CSV or Excel file. Each row becomes a pass, and rows with an email or phone become members. See Import and export.
Issue passes from your own system#
Paid plansPOST /pass issues passes from a website, booking system or till.
curl -X POST https://api.walletap.com/pass \
  -H "X-API-Key: $WALLETAP_API_KEY" \
  -H "Content-Type: application/json" \
  -d '{
    "passes": [{ "templateId": "tmpl_123" }],
    "email": "sofia.rossi@example.com",
    "sendToEmail": true,
    "sendToPhone": false
  }'
Issuing a pass this way delivers it: when the request carries an email or phone
number, Walletap emails or texts the pass link to that person. Send
"sendToEmail": false and "sendToPhone": false to issue without sending.
A pass issued over the API without a member appears on the Members tab grouped by its email or phone. See Issue your first pass.
If something goes wrong#
Upgrade appears in place of Create. Your plan cannot take another pass right now, and the dialog says why. No pass still creates the member; add the pass after upgrading. If the plan's limit is reached between opening the dialog and clicking Create, you see "Member created, but not the pass." with the reason — the member is kept.
"Member created, but the pass could not be created" — the member was saved, the pass was not. Select the member and use Add pass, rather than creating the member again.
"No contact on this form — the pass won't be sent automatically." The template's sign-up form asks for neither an email nor a phone, or neither was filled in. Enter an email or phone number before you click Create. Otherwise, open the pass from the member's passes table and share its link yourself, or add an email field to the form.
"Automatic delivery is off for this channel — the pass won't be sent." See When a pass is sent.
The Phone number field is locked. Phone numbers in the dashboard need text messaging on your plan.
A customer sees "Sign-ups for this card are paused right now." New cards are paused on your account. See Billing.